Приказивање постова са ознаком diy. Прикажи све постове

8/10/2015

Making flashcards


   Making flashcards electronically is a much quicker process, and they’re much easier to transport (I can access them all on my phone). They’re also better for the environment. I use an app called Flashcards Deluxe (this app is paid, but there is also a free version available). The app lets you create your flashcards, add pictures and sounds, and even download flashcards from other flashcard sites like Quizlet (this is the site that I use to create the sites but then they’re all downloaded onto the app). It has a great feature which lets you download auditory files so your device will actually read out your questions and then read out your answers as well. There are also testing modes, so that you can be tested on multiple choice questions (using your answers for other cards) and you can be timed on your answers as well (a kind of quick fire round). Below is a screenshot from one of my cards about vision. 
If you don’t want to use flashcards on your phone, but you still want to make electronic cards, I highly recommend using Quizlet. It’s got a really simple interface, and several games that can test you on the cards.
     Physical flashcards are made on pieces of paper or card. You can buy packets of ready-made flashcards, with the biggest available packs holding 1000 flashcards, but you can also make your own by cutting/ripping your paper/card to the size that you want it.  I usually buy my packs of cards from Paperchase (this pack specifically) and organise them in a clear plastic container (available here). I have used paper cards before and found it was useful to keep them all together on a small metal ring. When doing this, it’s also useful to use a hole reinforcers to support the holes (you can buy them here).
       Write your questions on the card. As I wrote the questions, once a side of card was filled up, I went through the questions to make sure that I wasn’t getting ahead of myself and then made the next card. I also printed some pictures/diagrams onto the cards if I felt that they were relevant to the topics/questions I was testing myself on. Here’s a small guide to printing on flashcards. And there’s another guide here (by winterevezakire)
I also used page tabs to mark the cards. I think blue page tabs meant that I kind of understood that card, but not fully and red/pink meant that I was hopeless on that card and it really needed looking at. This really helped me focus my studying on what I was struggling with.
         You can write answers on the backs of your flashcards as well. I tended to only do this if it was an answer that I knew I was really going to need help with or if I had already struggled to answer that question (as marked by the red tabs). 
The actual questions that I wrote were based on my lectures/readings. I tried to cover every topic. If I was struggling with a topic then it would be broken down into a lot of questions and then as I got more familiar with it, the questions would become more general. So for example, I have specific questions like “what is behind the cornea?” but when I get more used to this topic the questions will become more general things like “describe the anatomy of the eye” so that I’m not relying on my question wording or anything to retrieve the answer.
           I would give a word of warning about flashcards though. While I advocate their use, they shouldn’t be used in isolation. I find that flashcards are a very static approach to revision, which allows you to remember things and get a foundation knowledge, but they don’t help you understand because they don’t ask you to apply the knowledge, or question it, or see links between topics. To do that, other forms of revision are needed as well. 
Here are some links to some of my favourite flashcard sets for inspiration:

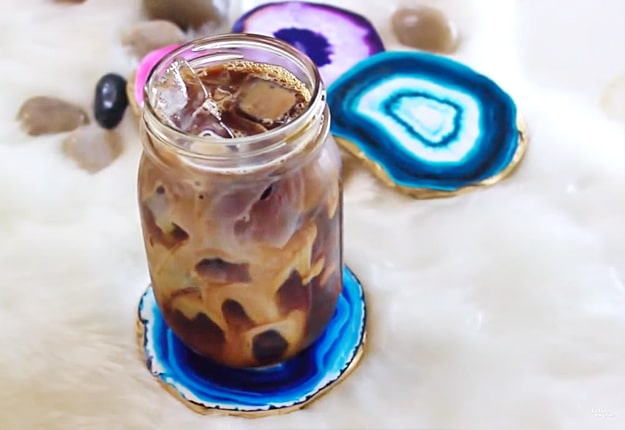
DIY Faux Agate Coasters

Here’s How:

Step 1

Use a pencil to trace the shape of your agate print on the cardboard. Make sure to cut your carboard over the shape that you have. 2 pieces or cardboard are needed for each print.
Cool Crafts for Teens to Make | Easy DIY Home Decor Ideas | DIY Faux Agate Coasters | DIY Projects & Crafts by DIY JOY

Step 2

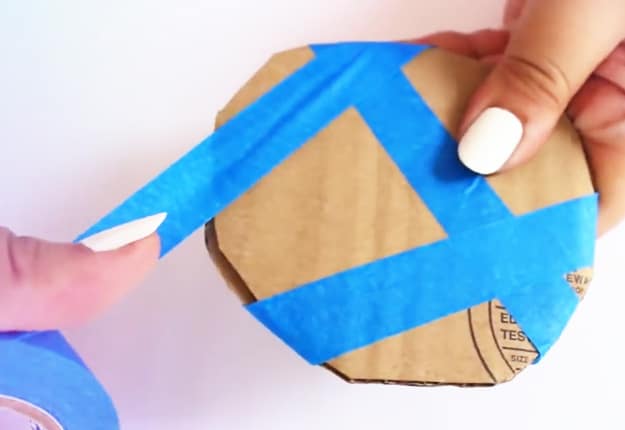
With your tape, start taping the 2 cardboards together going around and over it until they are enitrely covered with tape.
Easy DIY Projects for Teens | Cool Craft Ideas for the Home | Faux Agate DIY Coasters | DIY Projects & Crafts by DIY JOY


Step 3

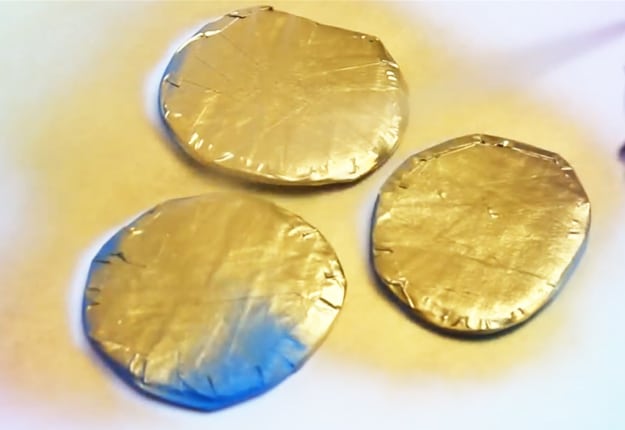
Once the cardboards are covered up, you can now start painting them with gold spray paint.
Cool Craft Ideas for the Home | Easy DIY Home Decor Projects | DIY Faux Agate Coasters | DIY Projects & Crafts by DIY JOY


Step 4

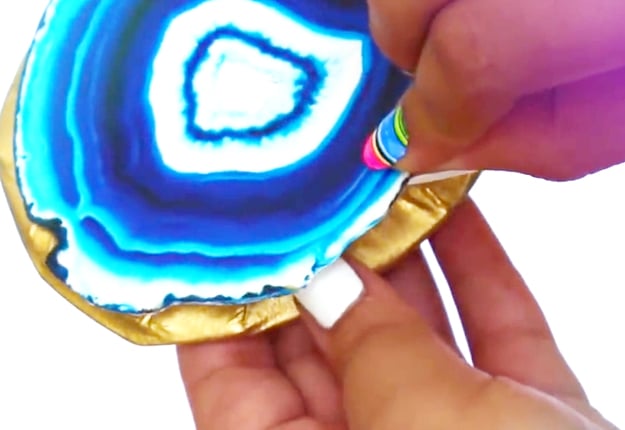
Spray a little glue to the back of the prints to stick them into the painted cardboard.
Easy DIY Home Decor Ideas | Cool Room Decor Crafts for Teens | DIY Faux Agate Coasters | DIY Projects & Crafts by DIY JOY

Step 5

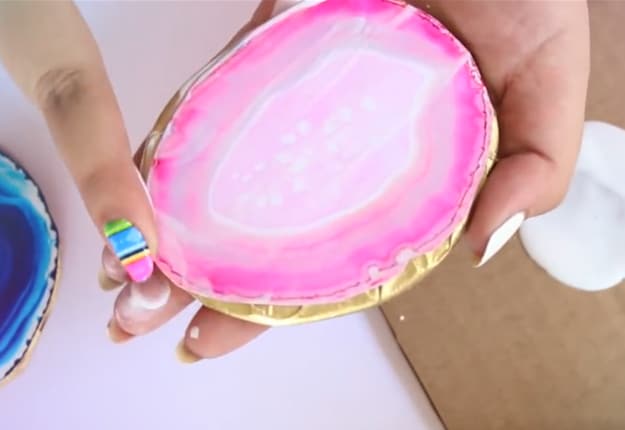
To make them water-proof, apply a thin layer of mod podge onto the surface of the agate print using your fingers. Let them dry for a couple of hours.
DIY Crafts for Teens to Make | Easy Crafts to Sell | DIY Faux Agate Coasters | DIY Projects & Crafts by DIY JOY


And your agate coasters are done!
Easy DIY Crafts to Sell | Cool Crafts for Teens to Make | Faux Agate DIY Coasters | DIY Projects & Crafts by DIY JOY

DIY PROJECT: FISH SCALE PENDANT LAMP


This is the second project we’ve shared from designer Kara Paslay in recent weeks, and again she’s managed to reintroduce me to a cool technique I had long forgotten about. Inspired by the ocean, Kara decided to transform a simple paper globe into a beautiful sculptural pendant lamp. By dyeing and dipping cut paper rounds into wax, Kara has transformed the material into an almost unrecognizable state. The “scales” have a glowing, translucent finish and a gorgeous deep watery hue, giving the lamp a beautiful texture, whether it’s unlit or switched on and glowing from within.
I can’t get over how far removed the end result is from a simple paper globe, and given that the whole project cost around $20 and can be done in an afternoon makes it even more appealing! If you’re looking to add some oceany colors and textures to your home for summer, this inexpensive and easy project might be the perfect choice. Thanks for sharing, Kara! — Kate
Have a DIY project you’d like to share? Just shoot me an email with your imagesright here! (Low res, under 500k per image, please.)
Read the full how-to after the jump . . .


Every year around this time, I start to daydream about the beach and the beautiful scenery that surrounds it. My beach dreaming, coupled with my love for the fish scale pattern and obsession with unique lighting fixtures spurred the idea for this fresh and fun DIY project. The different dye baths used in the project create a ton of watery texture, while the wax technique allows light to filter through the piece and adds to that “scale like” feel. The project can be completed in an afternoon for about $20, which means all of us who can’t make it to the deep blue sea this summer can at least surround ourselves with something sea inspired! Happy creating! — Kara Paslay

Materials
  • 110# paper
  • circle cutter (available at most craft stores)
  • Rit Dye
  • paraffin wax
  • mineral oil
  • crock pot
  • extra bowl
  • white paper lantern
  • glue gun

Instructions
1. Use your circle cutter and use 110# paper to create around 200 circles. The 200 circles will cover a 14 in. paper lantern.
2. Place the cut circles into a bucket of Rit Dye (I used the purple and purple mixed with teal) and allow them to darken to your taste. I chose to make my circles different shades to enhance the texture of the final piece.

3. Create a double boiler with your crock pot and extra bowl. Put a block of the paraffin wax in the extra bowl to melt. Once the wax is melted, add mineral oil to thin the wax. Make sure your circles are dry and then dip each one into the wax, making sure to leave a portion of the top clean and clear of any wax. Lay the circle on wax paper to dry.

Note: Dipping the circles in the wax makes the paper transparent and allows the light to pass through it more easily.

4. Once the wax has dried, start attaching the circles to a white paper lantern. Use a glue gun and be sure to place the glue on the portion of the circle that does not have wax on it.

5. Work your way around the lantern until it is fully covered. I started at the bottom and overlapped my circles in a fish scale-like pattern so the top layer would be at the top of the lantern.

6. Use the lighting kit that comes with the lantern to create an amazing light fixture!
Note: I tested the lantern using a 60 watt compact florescent lightbulb, and the wax stayed cool and completely intact. I recommend sticking with compact florescent bulbs to keep the heat in check.